Selecting the correct beaker size affects measurement accuracy, safety and workflow efficiency in any laboratory. Whether you are dispensing reagents in a pathology lab, mixing solutions in a Quality Control facility, or teaching a school science class, matching beaker volume and form to the task, minimises spillage, reduces contamination risk and improves reproducibility.
Choosing the wrong size, whether too small or unnecessarily large, can compromise both the accuracy of a measurement and the safety of the person handling it. This guide explains how to choose beaker size and type with confidence, covering volume selection, form, material and the accuracy standards that apply across Australian laboratory settings.
What size beaker do I need for general laboratory work?
Choose a beaker with a nominal capacity at least 20 to 50 percent larger than the volume you are measuring, as filling a beaker to the brim increases spill and contamination risk during mixing or heating.
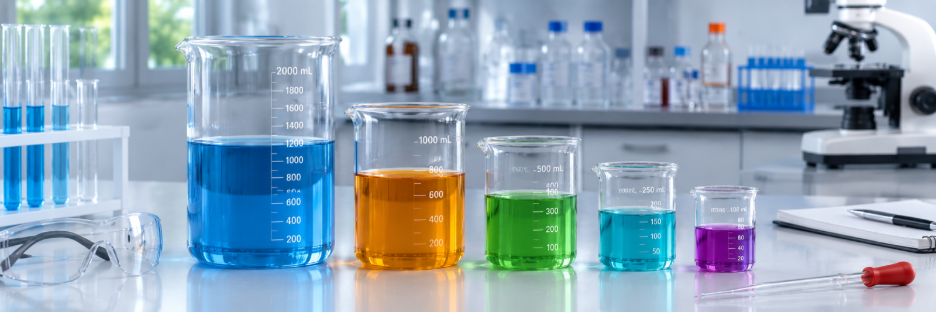
Most general laboratories keep a range of sizes on hand, typically 50mL, 100mL, 250mL, 600mL and 1,000mL, to cover routine reagent preparation, sample dilution and titration support tasks. Selecting a beaker that is too small forces frequent topping up, which introduces measurement error, while an oversized beaker makes it difficult to read graduations accurately at low fill levels. As a general rule, working volume should sit within the middle third of the beaker’s total capacity, giving enough headspace for stirring, heating or the addition of further reagents without risking overflow.
Stocking a broad size range also reduces the temptation to substitute an oversized or undersized beaker for convenience, a habit that quietly erodes measurement consistency over time, particularly in high-throughput settings where multiple staff share the same glassware.
What is the difference between low form and tall form beakers?
Low form beakers have a wider base and shorter height, suited to heating and evaporation, while tall form beakers are narrower and taller, better suited to precise measurement, mixing and pouring where splash control matters.
The Livingstone 150mL Tall Form Beaker is a practical example for smaller volume tasks requiring controlled pouring, such as reagent transfer or student practical work. Its narrower profile also makes it easier to store within limited bench or shelf space, which is a common constraint in smaller pathology and teaching laboratories.
When should I use a tall form beaker?
Tall form beakers are best for tasks involving pouring, stirring or transferring liquid, since their narrower base reduces evaporation surface area and their spout allows a more controlled, drip-free pour compared with low form vessels.
This makes tall form beakers a sensible default for routine bench work where volumes are moderate and precision during transfer matters more than heat distribution. They are also easier to grip securely with one hand, which reduces fatigue during repetitive dispensing tasks.
How do I choose beaker size for large volume mixing or heating?
For bulk solution preparation, buffer mixing or large batch heating, select a low form beaker with a wide base for even heat distribution and stability, and ensure the vessel has sufficient headspace to prevent boil-over.
Larger vessels such as the Livingstone 2,000mL Low Form Beaker suit environmental testing, industrial Quality Control and bulk media preparation, where handling stability and pour control across a larger surface are priorities.
When working with large volume beakers, it is worth considering how the vessel will be lifted and carried once filled. A 2,000mL beaker filled with liquid becomes considerably heavier and more awkward to manoeuvre, so laboratories should ensure benches are clear, stable and within safe carrying distance of storage or disposal points before decanting large volumes.
What is the difference between Class A and Class B beaker accuracy?
Class A glassware is individually calibrated to tighter tolerances and is required where measurement precision affects regulatory or diagnostic outcomes, while Class B glassware is bulk manufactured with wider tolerances, suitable for general and teaching applications.
Laboratories working within formal quality and accreditation frameworks should factor this distinction into their glassware selection, as traceable calibration underpins reliable results wherever accuracy is subject to audit or review.
How does beaker material affect size selection?
Borosilicate glass withstands thermal shock and repeated autoclaving, making it the standard choice across most volumes, while polypropylene beakers suit teaching environments or situations where breakage risk must be minimised regardless of size.
Larger borosilicate beakers require careful handling due to added weight and thermal stress risk during heating, so laboratories working with bigger volumes should factor in appropriate support equipment such as heat mats and tongs.
What safety considerations affect beaker size choice?
Oversized beakers used for small volumes reduce graduation reading accuracy, while undersized beakers increase splash, overflow and breakage risk, so safety and precision should both guide size selection alongside the volume being measured.
The Australian Science Teachers Association outlines safe handling and disposal practices for damaged laboratory glassware, noting that chipped or cracked items should be replaced promptly regardless of size, as structural weaknesses increase breakage risk under thermal or mechanical stress.
Choosing the right beaker size comes down to matching volume, form and material to the task, while considering accuracy class and safety requirements. Stocking a range of tall and low form beakers across common volumes gives most laboratories the flexibility needed for everyday work.
References
- Australian Science Teachers Association (ASTA) 2025, Laboratory glass and porcelain disposal, ASTA, Deakin, ACT.
- National Association of Testing Authorities, Australia (NATA) 2023, Testing & calibration (ISO/IEC 17025) accreditation, NATA.