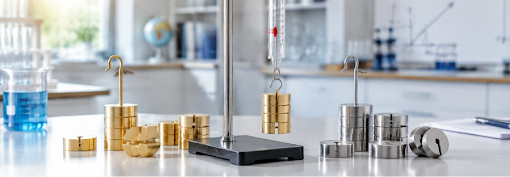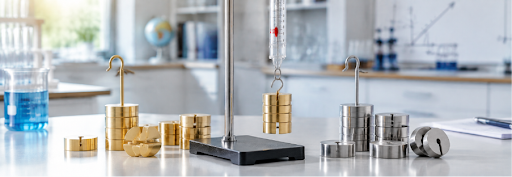
Somewhere between a beaker and a Bond villain’s secret weapon sits the humble specific gravity bottle, also known as a pycnometer. It looks unassuming, but this little glass vessel is one of the fussiest instruments in the lab. Get its calibration wrong and every density reading that follows will be quietly, confidently incorrect. Get it right, and you have a tiny glass genius that can tell you the exact density of almost anything you pour into it. If you are hunting through a collection of laboratory glassware trying to find the right one for the job, a Gay-Lussac specific gravity bottle is a solid, no-nonsense place to start. This guide walks through calibrating one properly, without the drama.
Step-by-Step: How to Calibrate a Specific Gravity Bottle

Step 1: Give It a Proper Clean
Wash the bottle and stopper thoroughly, rinse with distilled water, and then dry completely. Any residue, dust or stray fingerprint oil sitting inside will throw off your mass readings later, so this is not a step to rush.
Step 2: Weigh the Empty Bottle
Weigh the clean, dry bottle with its stopper in place, using an analytical balance accurate to at least three decimal places. Record this as your empty mass. Do this a few times to make sure the reading is stable and repeatable.
Step 3: Fill With Distilled Water
Fill the bottle with freshly boiled and cooled distilled water, which removes dissolved air that could otherwise sneak in as bubbles. Insert the stopper carefully so the capillary hole allows any excess water to escape, leaving the bottle filled to its exact calibrated volume.
Step 4: Bring It to a Set Temperature
Density is temperature-sensitive, so the filled bottle should sit in a temperature-controlled water bath, typically around 20°C, until it stabilises. Patience matters here. Rushing this step is the calibration equivalent of pulling a cake out of the oven early.
Step 5: Dry and Weigh Again
Remove the bottle from the bath, wipe the outside completely dry with a lint-free cloth, and weigh it again. Subtracting the empty mass from this reading gives you the mass of water the bottle holds.
Step 6: Calculate the True Volume
Using the known density of water at your recorded temperature, divide the mass of water by that density to get the bottle’s true internal volume. This figure becomes your reference point for every density test performed with that bottle going forward.
Step 7: Repeat for Confidence
Run the process at least twice more. If your results cluster tightly together, you have a reliable calibration. If they wander, something in your technique, temperature control or glassware needs a second look before you trust the number.
What Does Calibrating a Specific Gravity Bottle Actually Mean?
Calibration, in this context, is not about tuning the bottle like a violin. It is about confirming the bottle’s true internal volume using a liquid of known density, almost always distilled water. Every specific gravity bottle is manufactured to a nominal volume, but tiny variations in glass thickness and stopper fit mean the real volume can differ slightly. Calibration nails down that real number so every future measurement is built on solid ground rather than guesswork.
Why Bother Calibrating at All?
Because the entire pycnometer method hinges on one simple ratio: the mass of your sample compared to the mass of an equal volume of water. If your “known” volume is even a fraction off, that error rides along in every single density calculation you ever make with that bottle. Skipping calibration is a bit like setting off on a road trip with a speedometer that lies to you. You might get there eventually, but nobody will trust your ETA.
Why Is Specific Gravity Bottle Calibration Important?
Small measurement errors can have a surprisingly large impact on density testing. When a specific gravity bottle is used repeatedly, even a slight difference between its stated capacity and actual capacity can influence the results produced from it.
Regular calibration helps laboratories maintain confidence in their measurements, particularly when density or specific gravity results are used for quality control, formulation checks, material identification or research.
It is especially important when results need to be:
- Accurate: Measurements should reflect the sample’s actual properties as closely as possible.
- Repeatable: Repeated tests should produce consistent results when the same method is followed.
- Comparable: Results from different samples or testing periods should be meaningful when assessed against one another.
- Traceable: Calibration records provide useful evidence that the glassware has been checked as part of laboratory quality procedures.
In other words, calibration is not simply an extra step before using a pycnometer. It is part of maintaining confidence in the measurements that follow.
Signs Your Bottle Needs Recalibrating
- It has been dropped, chipped or had a stopper swap with another bottle
- It has not been calibrated in longer than your lab’s quality procedure allows
- Repeated weighing is giving inconsistent results
- It is brand new and has never been calibrated at all
Common Calibration Mistakes to Dodge
- Handling the bottle by the bulb instead of the neck, which warms the glass and skews readings
- Forgetting to remove trapped air bubbles before sealing
- Swapping stoppers between bottles, since each is ground to fit its own bottle
- Weighing before the bottle has fully reached the target temperature
Wrapping It Up with a Bow (Not a Bunsen Burner)
Calibrating a specific gravity bottle is not glamorous work, but it is the kind of quiet diligence that makes every density result downstream trustworthy. Treat the process with a little patience, keep your technique consistent, and your pycnometer will reward you with numbers you can stand behind, no crossed fingers required.

References
Global Gilson, n.d. Specific Gravity of Soil: Understanding ASTM and AASHTO Methods. Available at: https://www.globalgilson.com/blog/soil-specific-gravity-test (Accessed: 19 August 2026).
University of Utah, Department of Chemical Engineering, n.d. Pycnometer. Available at: https://www.che.utah.edu/academic_program/projects_lab/pycnometer/ (Accessed: 19 August 2026).